Burberry X Google Hackathons

While working at Burberry I had a few opportunities to work directly with some of the lovely people at Google, focussing on site speed, resilience, and improving the user experience.

Working with Google representatives, we organised a series of fascinating hackathon events relating to improving perceived performance, and not losing an offline user.

Perception of speed

These sessions started with an introduction for that hackathon’s theme; for example, a “Perceived Performance” session described the 2009 study at an airport in Texas where complaints were abnormally high for a baggage delivery time that was below the average wait time – the cause eventually was discovered to be due to the arrival terminal being only 1 minute from the baggage claim area, so although passengers were fast to disembark the plane and get through the terminal, they were then waiting around for their luggage.

The solution that most improved passenger happiness was to increase the distance between the arrival terminal and baggage reclaim, such that, although the delay between arriving and receiving baggage was largely the same, it was spent actively moving; passengers were not feeling like they were wasting their time passively waiting around.

This was a great example of if you can’t make something actually fast, make it seem fast enough.

Offline (or is it?)

Some other interesting hacks were related to the user being offline; something that is more common that teams might expect. Mobile traffic has soared over the past few years, leaving desktop traffic in its wake.

One huge difference between desktop and mobile is the connectivity: WiFi / ethernet is more reliable than traversing the physical space that makes up a mobile network: jumping between cell towers, moving through built up areas and underground transport dead zones.

The default website reaction to this would be a browser error page; however, given how often a mobile user might see this on your site, it’s certainly worth considering mitigations.

The first hack to mention was one where I suggested a couple of new engineers attend; surprised at the invite, they asked what should they do?!

My suggestion was to implement client side caching via a service worker for any visited product detail page (PDP), and alter the product listing page (PLP) to greyscale any images of products that were not in the cache when the user is offline; this allows the user to still hop between listing page and detail pages for products they’ve already seen – which they can clearly identify – until they’re back online.

(Mock up of how a “greyscale if not cached” product listing page could look)

This suggestion was implemented beautifully, and that team won the multi company hackathon! Go team!


The second mentionable hack, although developed at a much later hackathon, would turn out to be complimentary to the first.

By utilising a service worker and custom javascript (background sync doesn’t work in Safari, which was the biggest mobile market for ecommerce), the user could still add products to their basket while offline, synchronising the basket automatically once connection is restored. This was slick, and using it by default could avoid annoying “wait, did that add to my bag? Should I click again?” situations. (I did a talk about Optimistic UI at some point also, which relates to this)

This could potentially be progressively enhanced further to simplify and use the new Periodic Background Sync API, or the WebWorker Background Sync API for browsers that support them. I’ll leave it as an exercise for the reader! Fancy trying it?

Being able to involve a large subset of the digital department – including all roles, not just engineers – was fascinating. Getting everyone on shared context, and seeing what is actually possible in browsers with a relatively small amount of code and effort, was an eye opener for many.

If you are unsure the value of a hackathon, or not sure how to run one, contact someone who has done it before to help define desired outcomes, set the agenda, and help it go smoothly. The lovely people at Google did this beautifully for us at Burberry, and I’m happy to advise also!

Rent vs Buy vs Build

AKA “Is your Company a Software House or is it a Retailer?”

These days you can easily set up an online shop in a matter of minutes/hours, buying no hardware, setting up no software; just signing up to something like Shopify (or WooCommerce if you’re using WordPress) for a few coins a month and you can sell goods and services online.

You’re spoiled for choice if you have more money to invest, thanks to a proliferation in professional solutions for being an online retailer.

The complexity hidden behind these few setup clicks is quite staggering for those of us who were involved in building e-commerce in the earlyish years.

Back in the early 2000s, there weren’t many options for powering an e-commerce website. Without regular reviews of the ecosystem, some of us might have fallen into the trap of spending a lot of time and effort “writing software” instead of solving business problems or helping meet business goals; the “Software House” vs “Online Retailer” dichotomy.

For example…


Content

In the really days of E-Commerce your Content Management System (CMS) choices were limited, to the point that many of us cut our teeth in the industry by thinking “how hard can it be to build a CMS?” before wasting months of our lives discovering the edges of what a CMS needs to actually do and vowing to just pay for someone else to build it for us next time.

And that’s just managing content that might appear on a web page, in various languages, updated via a separate user interface that someone less technical needs to interact with. Which is a product within itself. Should we really be building this if we’re not working at a Software House?

Product

Let’s get further into the hidden complexity I hinted at; an e-commerce website needs some fairly obvious features:

  • Display many products
  • Display a single product

To the techie brain this might seem quite simple (and let’s assume it is for now):

  • Display many products: a list of records from a database, displayed on the screen (easy!)
  • Display a product: one specific record from a database, displayed on the screen (pah! a breeze!)

Might as well just build this ourselves, right?

But how does that data get into the database in the first place? Who enters the data, and how? What is the operational process to say “this product is ready to be displayed and purchased”?

Now we’re getting away from “tech” and back to “product management”.

A workflow or process that involves several people over several locations – sometimes several teams or several companies – to order goods, receive goods, check the quality of those goods, take photos, associate photos with products, enter prices, enter product details – translated for different markets, obviously – and SO. MUCH. MORE. Which is a product within itself. Trying to constantly overcome these obstacles by writing software might not be the correct solution to achieve the goals.

Payment

Now a user wants to buy one of these nicely displayed products; we’re talking about user account management, securely handling personally identifiable information – which can be painful; annual PCI compliance reviews, anyone? – taking payment details from a customer via a website, talking to a bank to take their money, updating the internal accounting systems, etc. Which is a product within itself. Should we be putting ourselves through this? Is there an easier solution?

Fulfilment

Now that order has to be fulfilled; it needs to be sent to the fulfilment centre (e.g., warehouse), the products need to be found (some clever mapping system to optimise a warehouse worker’s route, of course), packaged, and shipped (via the relevant shipping provider), tracked, and all this communicated back to the user and the accounting system as products leave. Which is… yeah. Surely an online retailer has better uses for those limited funds?

Enter: “Backoffice”

It was around the early 2000s that I started working at Asos (then known as “As Seen On Screen”, where you could buy products that you would have seen on TV and in films, likely due to these products being placed in that show by a company called Entertainment Marketing, from which Asos was spawned).

Low on budget, high on youthful enthusiasm, we essentially built all of the above, and much more.

A full, end to end, Product Information Management (PIM) workflow solution; a CMS with translation workflow; an Order Management System (OMS) – all as a horrible blue and yellow .net WebForms website (without the benefit of designers to help make this side of the website look good, it fell to techies to squeeze <table>s everywhere and choose colours like salmonpink and goldenrod because they sounded funny), which we called “BackOffice”.

We built dozens of Windows applications which had to run on a specific server which we accessed via RDP to view a screen full of running application GUIs since we hadn’t learned how to make windows services yet, all to process orders, process payments, integrate with the warehouse (Warehouse Management System, WMS), integrate with the barcode printers, process the product ordering workflows, etc.

Half of the IT department was dedicated to managing these internal systems which evolved massively over the following two decades; several being replaced by emerging systems that focussed on solving these problems better than would have been managed internally.

Each of which is a product within itself

I’m reminded of this work after attending a recent tech event for a well known Product Information Management solution; I had the opportunity to meet with the founder and CEO, and discovered that the entire product came about because he worked for a consultancy that, like we did at Asos, built a custom solution for a client in the early days of e-commerce, but they kept the rights to that intellectual property. They realised the value of this solution, white-labelled it, and continued to evolve it as they brought more and more clients on board. This is now a very successful and complex product.

It made me think about how, had we the entrepreneurial foresight back then, we might have been able to take each of those systems we created for one “client” and spun them off into their own white-labelled products, developing separately; a decent enough CMS, a decent enough PIM, and decent enough (and PCI compliant) payment processing and accounting solution, a decent enough Warehouse Management System. We had certainly invested enough time and effort in each of them.

How does your company make money?

All of which brings me to another question I like to subtly ask when I’m getting involved with clients who are keen to build their own in-house solutions: “are you a software house, or a retailer?”

Building a CMS is no easy task. Integrating with a complex “MACH” one is no easy task either, to be honest, but using something well established like WordPress can be quite manageable.

The same is true for a PIM, OMS, Payment Processor, WMS, etc. Maintaining each of these is just as much work as building them. Evolving each of these to adapt as the surrounding ecosystem shifts equally takes a lot of effort and time.

If, like the company whose event I attended, you can make money by selling the software you’re intent on writing yourself – congratulations, you’re a Software House! Stop selling other products (or at least, split the company)!

However, if, like so many websites out there, you make money by differentiating on the products you sell and not how you sell them, then maybe consider if spending all this money on solving an already solved problem yourselves is where you want to invest long term.

Are you the company that Builds a solution, or a company that Rents or Buys from that other company instead? Make sure you take a step back before diving in and “writing code” instead of “solving the problem”

Browser Super Powers: getUserMedia

In case you didn’t already believe it, your Web Browser has super powers. No longer is it something to merely display a document marked up with hypertext.

No longer is it limited to the read-only text and images of the olden days (aka the last two decades or so). Oh no. Now that the browser wars have cooled down, and the commons group are collaborating and updating the W3C standards rapidly enough for the eager-beaver browser vendors, we’re seeing new functionality quickly adopted across all major browser.

One of these super powers allows us to access the user’s microphone and camera (with their permission) using a one-liner:

var promise = navigator.mediaDevices.getUserMedia(constraints);

where constraints define the device preferences, such as:

{
  audio: true,
  video: {
    width: { min: 1024, ideal: 1280, max: 1920 },
    height: { min: 776, ideal: 720, max: 1080 },
    facingMode: "user"
  }
}

Here we’re requesting permission to access the device’s microphone and the camera, with a minimum and maximum requirement around the camera resolution, as well as defining a preference for the front-facing camera if available (facingMode).

This is all just plain old javascript too! At the time of writing, you only need to worry about ye olde IE and Opera Mini not supporting it.

Don’t believe me? Go to a website that uses HTTPS, open your browser’s Developer Tools and paste this in to the console:

var constraints = { audio: true, video: true }; 

navigator.mediaDevices.getUserMedia(constraints)
.then(function(mediaStream) {
    var video = document.createElement('video');
    document.getElementsByTagName('body')[0].appendChild(video);
    video = document.querySelector('video');
    video.srcObject = mediaStream;
    video.onloadedmetadata = function(e) {
        video.play();
    };
})
.catch(function(err) { console.log(err.name + ": " + err.message); });

You’ll be prompted for permission to access your devices:
browser requesting permission to access camera

If you allow, then you can scroll to the bottom of the page and see your lovely face appear in a dynamically generated video tag:

dynamically added video element with my pretty face in it
Amazing, right?

Web browsers are getting closer to native apps in what they can achieve, and getUserMedia (aka Stream API) is just one example of this.

How to create an Apache-licenced Private WebPageTest setup, and get the Classic Interface

In my previous articles I took you through the process of setting up your own private WebPageTest, either via the AWS interface, or via Terraform infrastructure as code).

By default, this would create a Private WebPageTest instance that uses the latest code on the release branch of the official WPOFoundation github repo for WebPageTest.

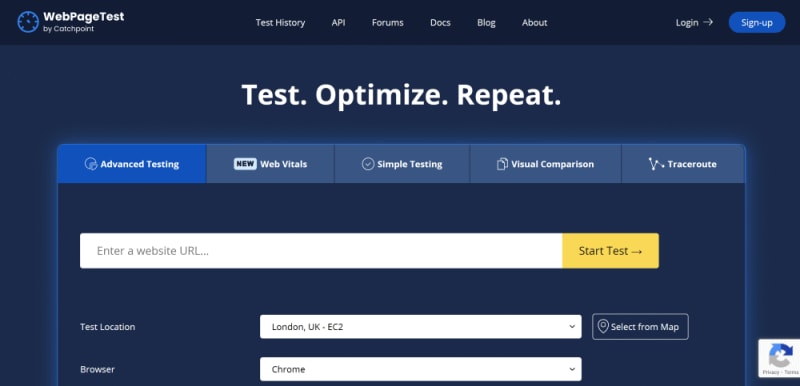
new webpagetest ui

This is great if you like the newer UI (it’s not as up to date as the official WebPageTest.org site, which obviously evolves much faster), but it might not be what you want for a couple of reasons:

  1. You preferred the original, classic, WebPageTest UI, or
  2. You plan to monetise your private WebPageTest setup, which violates the release branch’s LICENSE.md entry about “Noncompete” and “Competition”

Since WebPageTest existed loooong before Catchpoint bought it up, the original version of the code (the fully open source version) still exists, and has no such non-competition concerns. It does have a LICENSE file, but that just lists all the licenses associated with the other libraries WebPageTest uses.

By the way, the same is also true for the WebPageTest agent – master branch & release branch vs apache branch – so bear that in mind if you’re creating a competing product. Presumably this is what Speedcurve do, for example. (Apparently so!)

In this article I’ll show you how to tweak the previous private WebPageTest installation scripts and setup processes to use the apache branch, thus reverting to the “classic” UI, and freeing you up from non-competition concerns. (if you get rich because of this article, please buy me a coffee and hire me, thanks 😁)

Continue reading

Automate Your WebPageTest Private Instance With Terraform: 2021 Edition

This article assumes you have an understanding of what Terraform is, what WebPageTest is and some AWS basics.

all the logos

Have you ever wanted to have your WebPageTest setup managed as infrastructure as code, so you can keep all those carefully tuned changes and custom settings in source control, ready to confidently and repeatedly destroy and rebuild at a whim?

Sure you have.

In this article I’ll show how to script the setup of your new WPT server, installing from a base OS, and configuring customisations – all within Terraform so you can easily rebuild it with a single command.


Continue reading

Google’s Chrome User Experience Data in WebPageTest

This article assumes that you know the basics of AWS, WebPageTest, SSH, and at least one linux text editor.

Chrome User Experience Report logo + WebPageTest Logo + Core Web Vitals' LCP thresholds. Quite a busy hero image, I'll admit.

When talking to people about website performance stats, I’ll usually split it into Real User Metrics (RUM) and Automated (Synthetic/Test Lab):

  • RUM is performance data reported from the website you own, reported into the analytics tool you have integrated.
  • Automated are scripted tests that you run from your own performance testing tool against any website you like.

RUM is great: you get real performance details from real user devices and can investigate the difference in performance for many different options.

For example, iPhone vs Android, Mac vs Windows, Mobile vs Desktop, Chrome vs Firefox, UK vs US, even down to ISP and connection type, in order to see who is getting a good experience and who can be improved.

This data is invaluable in prioritising performance improvements, since you can tie it back to the approximate number of users it will affect, and therefore the impact on your business.

There are loads of vendors who can provide this for you (I’ve used many of them), or you can write your own – if you’re a glutton for punishment (and high AWS bills – ask me how I know…😁)

However, since this is measured on your own website and reported into your own tooling, you can only see such real-world performance detail for your own website; no real-world user experience data from your competitors.

Automated tests are great: you get detailed measurements of any website you can access – your own or competitors, or basically any website – in a repeatable fashion so that you can track changes over time.

You can have as many automated tests as you like, you can test from wherever you’re able to set up a test agent, and with whatever device you’re able to automate or emulate.

However, since these are all automated tests running because you said so, you can’t use them to understand how users are using your site, on which devices, what devices are underperforming others, and from where.

Again, there are a load of vendors who can provide this for you; writing your own is a bit more of a headache though – I wouldn’t recommend it, especially while wpt continues to be free for self hosting.

What if you could get some of the usual key performance metrics you’re used to with RUM, but for sites you don’t own such as your competitors?

In this article I’ll talk about the Google Chrome User Experience dataset and how to use it in your performance test setup to find the intersection of RUM and Automated performance test results, wiring it all up into your WebPageTest setup! Continue reading

WebPageTest Private Instance: 2021 Edition

Catchpoint's WebPageTest

The fantastic WebPageTest, free to use and public, has been available to set up your own private instances for many years; I wrote this up a while back, and scripted a Terraform version to make this as easy and automated as possible.

For AWS it was just a case of creating an EC2 instance (other installation options are available) with a predefined WPT server AMI (amazon machine image), add in a few configuration options and boom – your very own, autoscaling, globally distributed, website performance testing solution! New test agents would spin up automatically in other AWS regions, all based on WebPageTest Agent AMIs.

In 2020 WebPageTest was bought by Catchpoint and we finally saw improvements being made, pull requests being closed, and the WebPageTest UI getting a huge update; things were looking great for WebPageTest enthusiasts! If you havent heard of Catchpoint before, they are a company who are all about global network and web application monitoring, so a good match for WebPageTest.

Unfortunately, however, this resulted in the handy WebPageTest server EC2 AMIs no longer existing. If you want your own private installation you now need to build your own WebPageTest server from a base OS. It can be a bit tricky, though it gives you greater understanding of how it works under the hood, so hopefully you’ll feel more confident extending your installation in future.

In this article, I’ll show you how to create a WebPageTest private instance on AWS from scratch (no AMI), create your own private WebPageTest agents using the latest and greatest version of WebPageTest, and wire it all up.

Continue reading

Creating a 4G router using a Raspberry Pi and a mobile phone

A few days ago these workmen were using cutting machinery dangerously close to my broadband cables:

Shortly after this picture was taken – bang! No internet! They cut the cables while doing their work!

Two adults working from home on back to back video calls, one high-schooler also on video classes, and one primary-schooler with streaming classes – all suddenly disconnected from the world!

That afternoon we huddled around the kitchen table, mobile phones on with hotspots enabled to get through the rest of the day – but this wouldn’t work for regular use.

The broadband company said it wouldn’t be fixed for weeks due to how badly everything was damaged; the pavement would have to come up! I had to think of a pragmatic solution.

In this article I’ll go through the steps I took to completely swap my home broadband for a Raspberry Pi and a spare mobile phone – and show the results!

Continue reading

Setting up an Android phone as a WebPageTest agent

Pixel 2 connected to a raspberry pi

Running detailed website performance tests is often necessary to understand how a website is experienced by an end user in order to identify opportunities for improvements.

WebPageTest.org gives us the ability to run these tests from all over the world – the public instance even gives us access to real devices, so we can check how a site works across different browsers on different versions of different operating systems on different real devices!

In my previous articles I explained how to easily set up your very own private, autoscaling, WebPageTest server. This private instance creates test agents in AWS, dotted around AWS regions, which can emulate a mobile browser; this uses the device emulation in Chrome to throttle network, CPU, memory, etc and change the available screen size.

While this mobile emulation is simple to set up and use, sometimes an emulator isn’t enough; device-specific edge cases, operating system limitations, and performance on a real device may need to be validated to get confidence that everything works as expected in the real world.

In this article I’ll show you how to set up an Android phone as your own WebPageTest agent to connect to your private WebPageTest server, controlled by a Raspberry Pi!

Continue reading